Woodworking Projects

Optical Illusion Cutting Board

I work from home. My day job desk is in my Shop. Which makes for a wonderful place to be while in a conference call. Last week I thought it would be kind of slick to make a cutting board while attending meetings where I wasn’t an active participate. Just needed to mute when I was running the saws. I thought it would slicker if a flat cutting board appeared to be 3 dimensional.

Here are the steps:

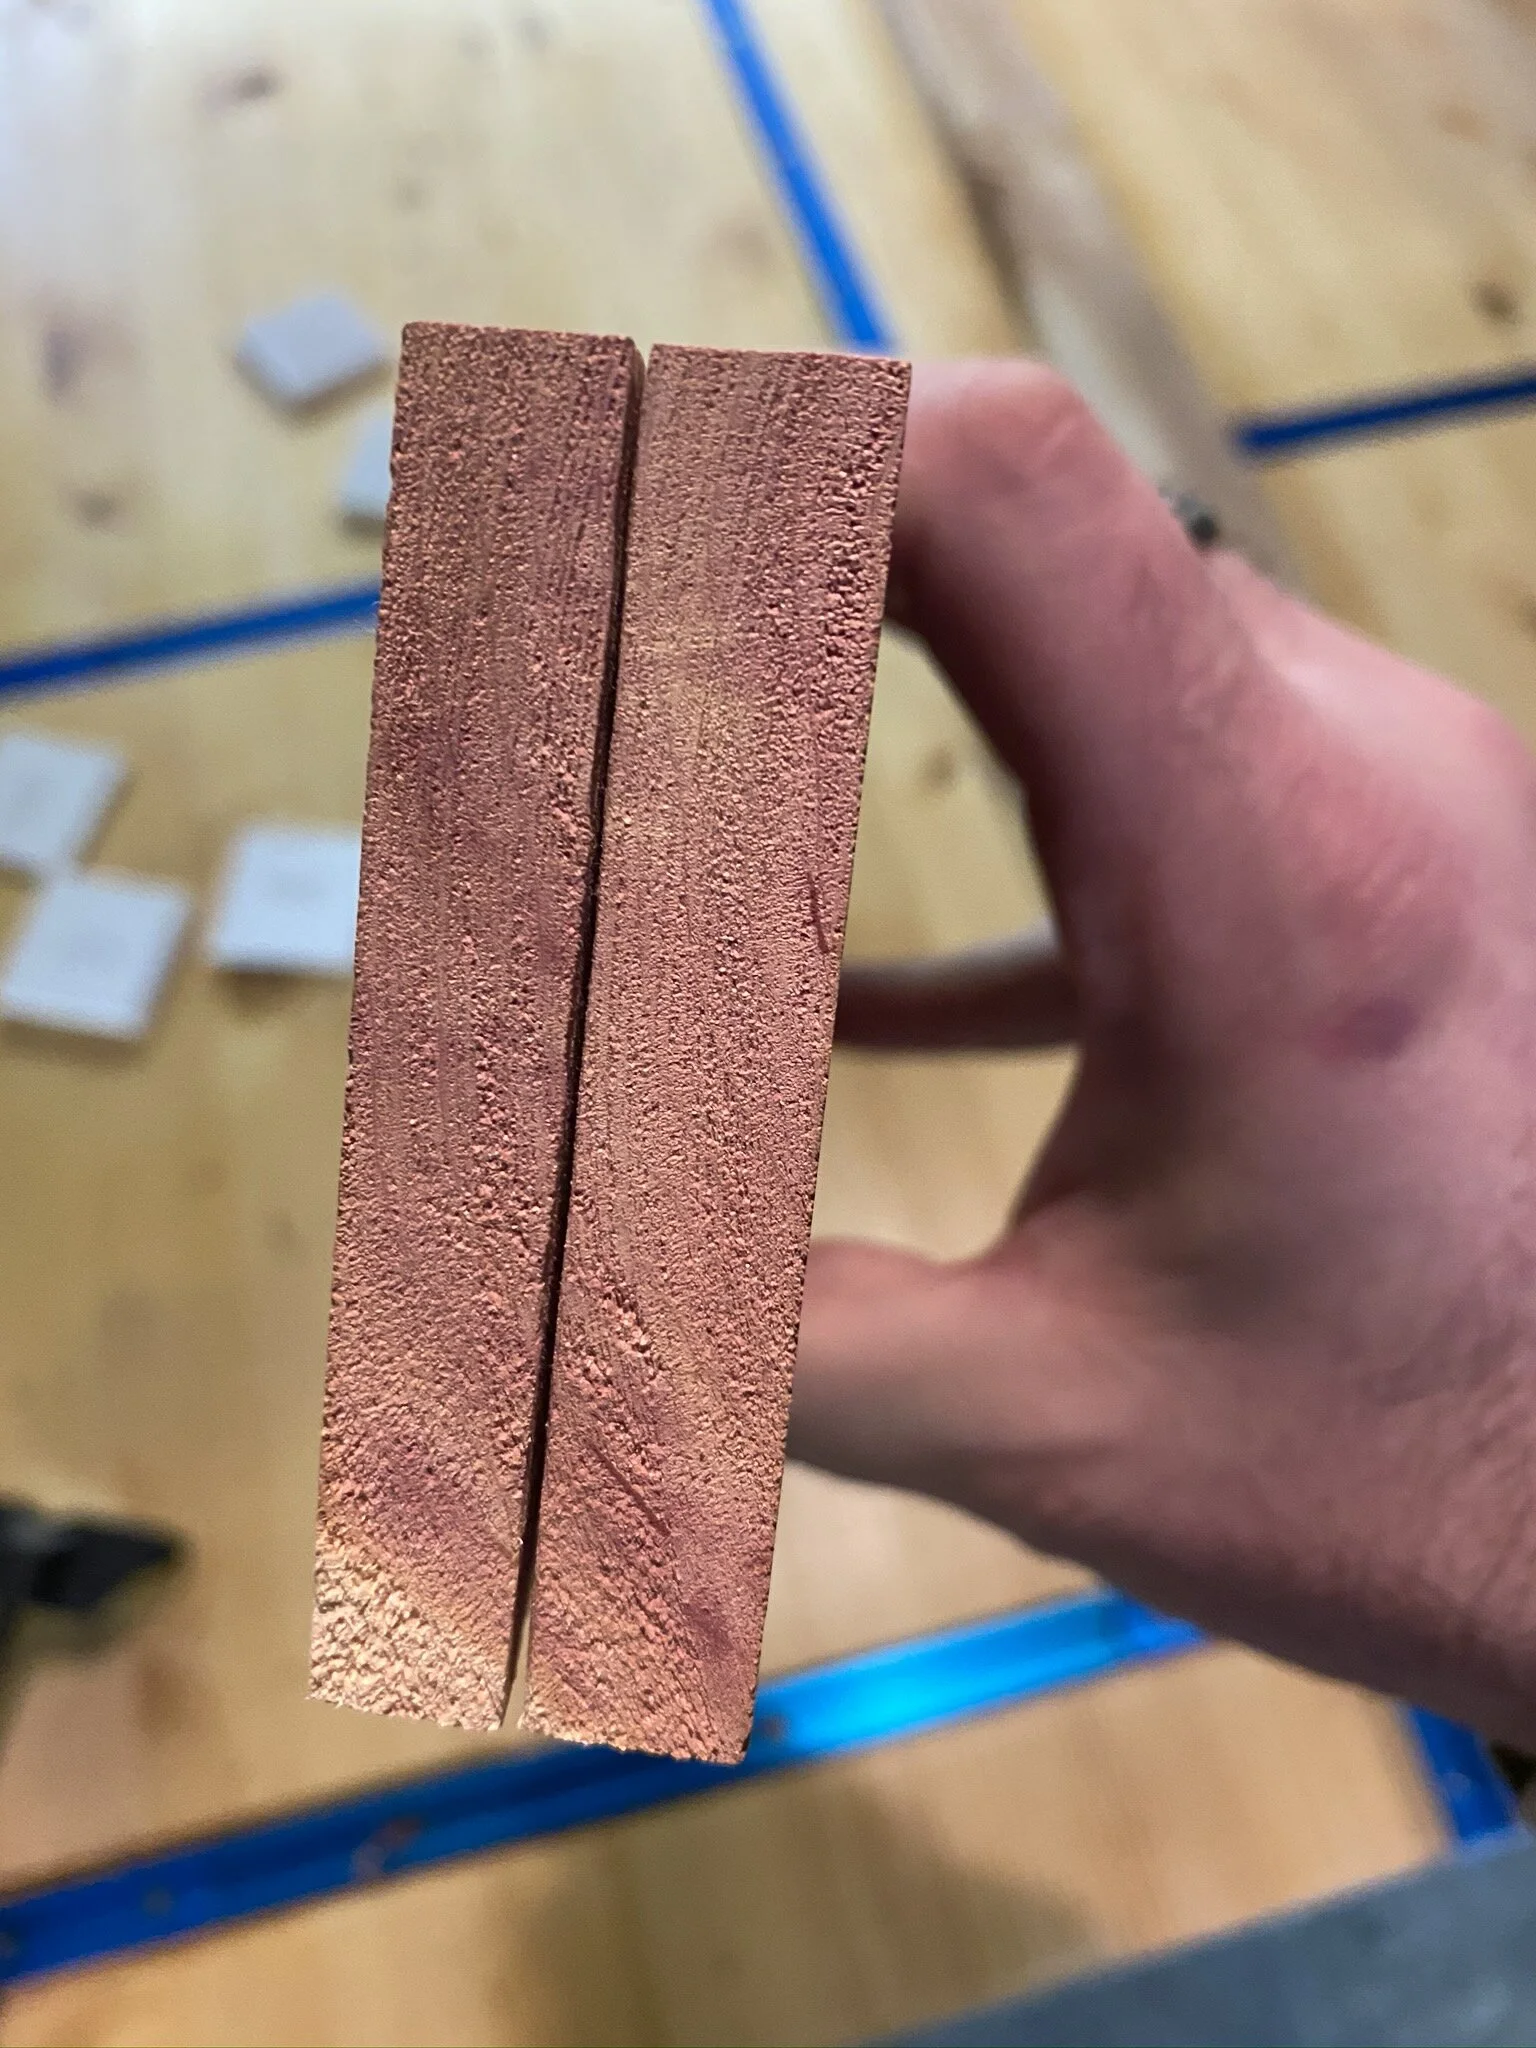
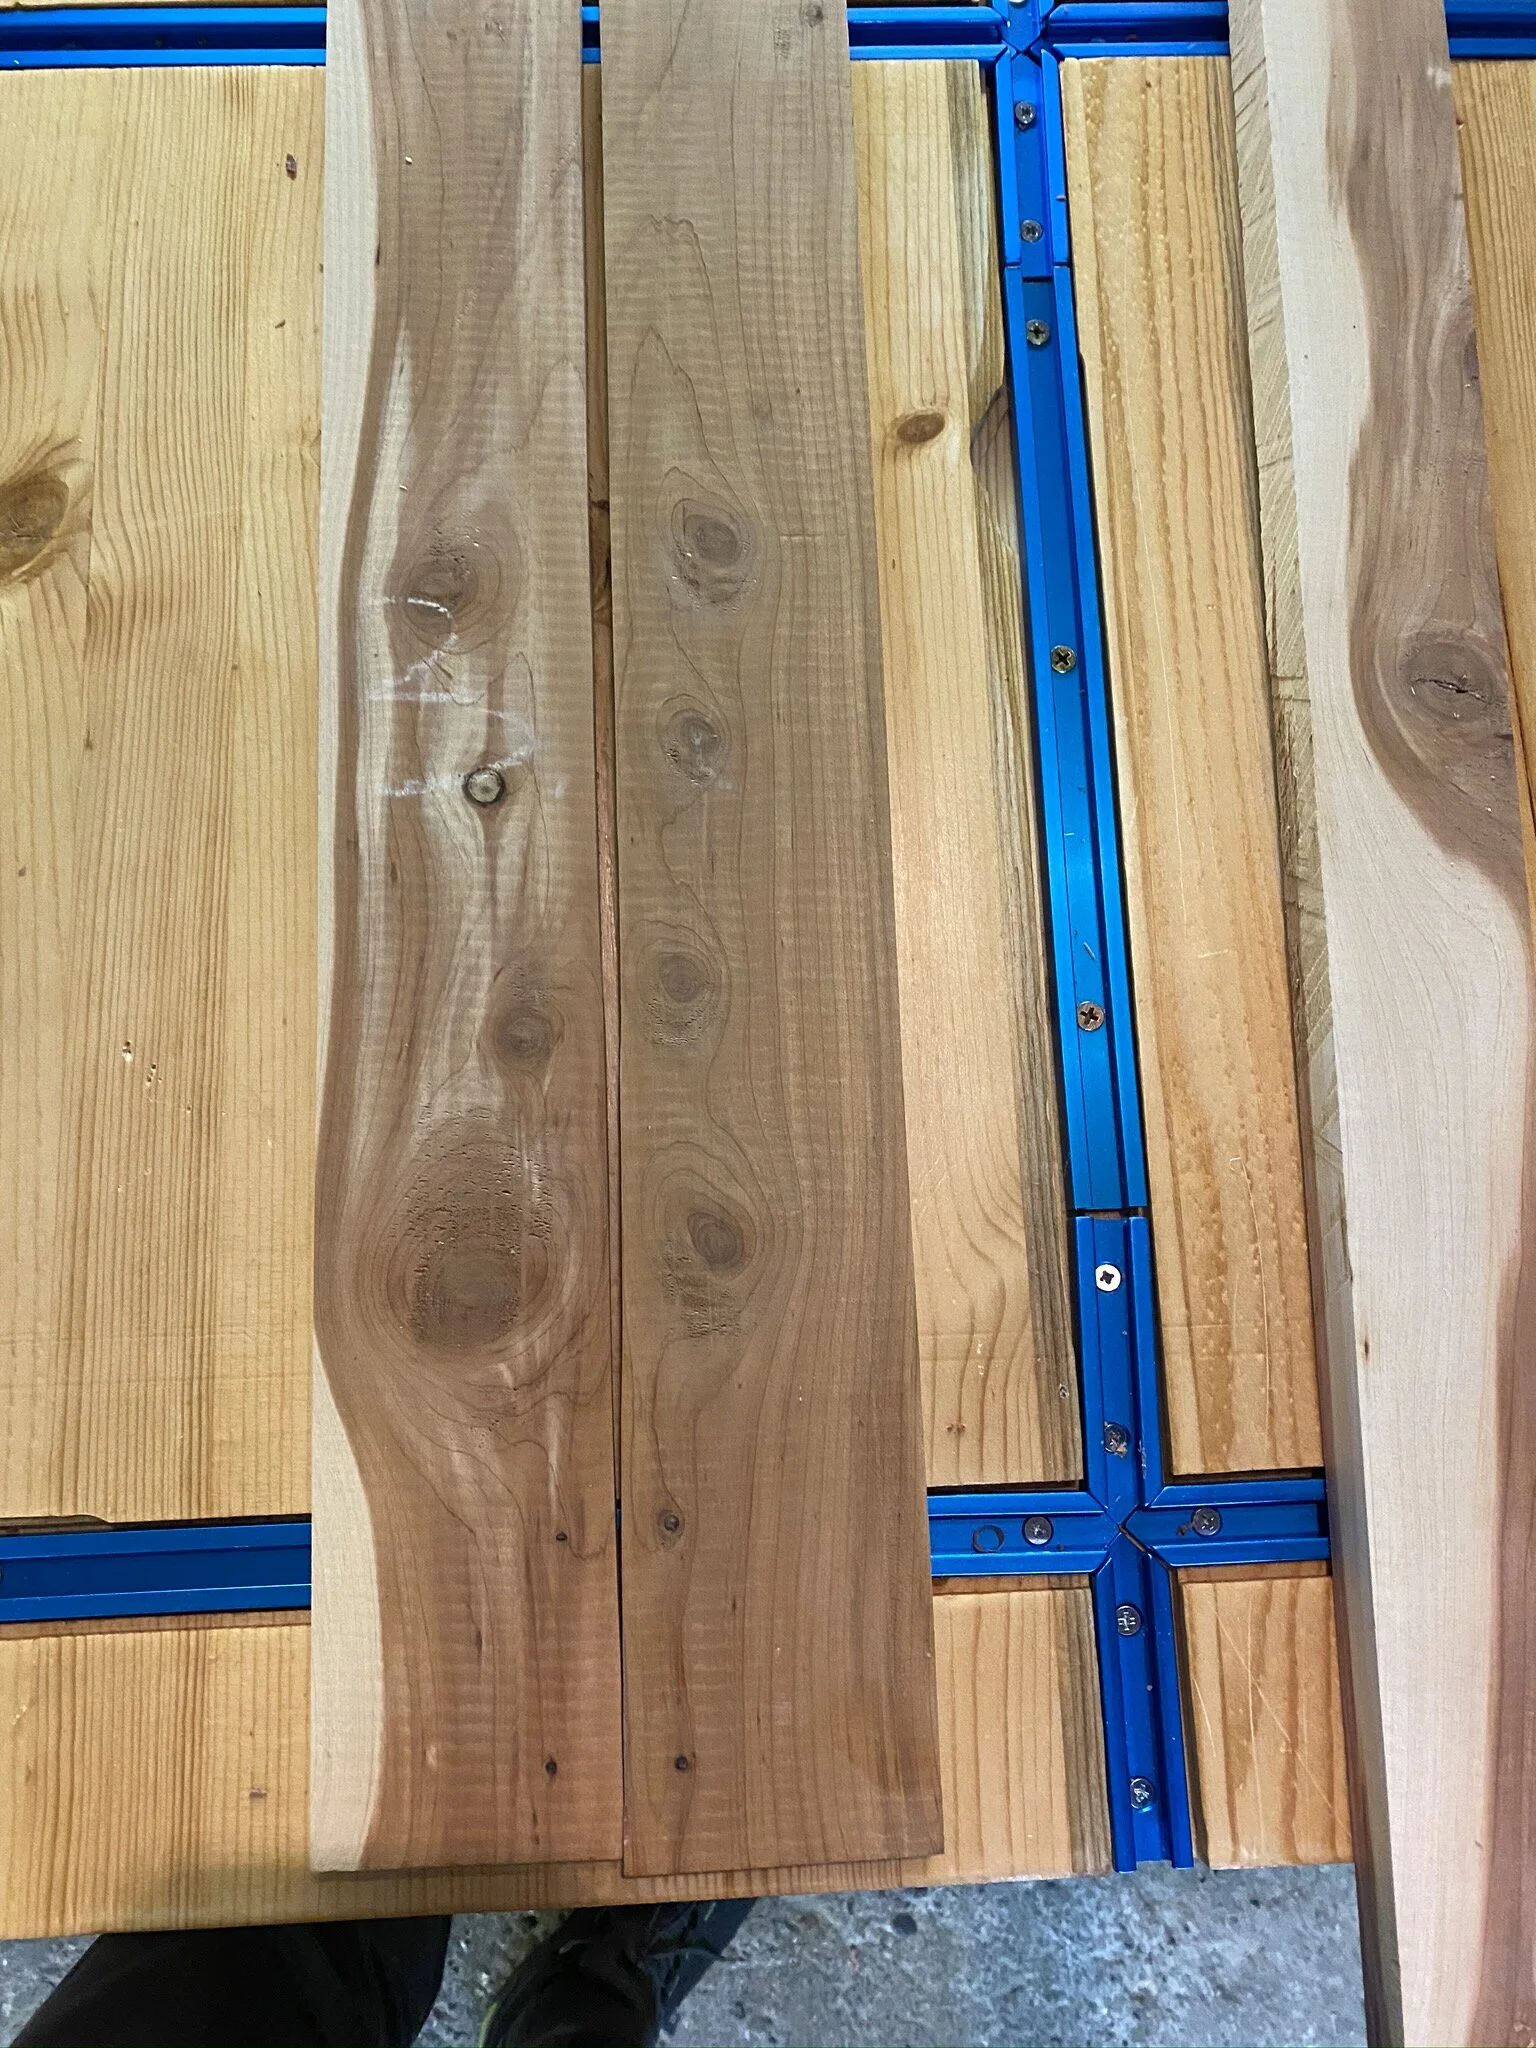
1) Rip 2” wide 16.5” long each strips of Walnut, Cherry, and Ash.
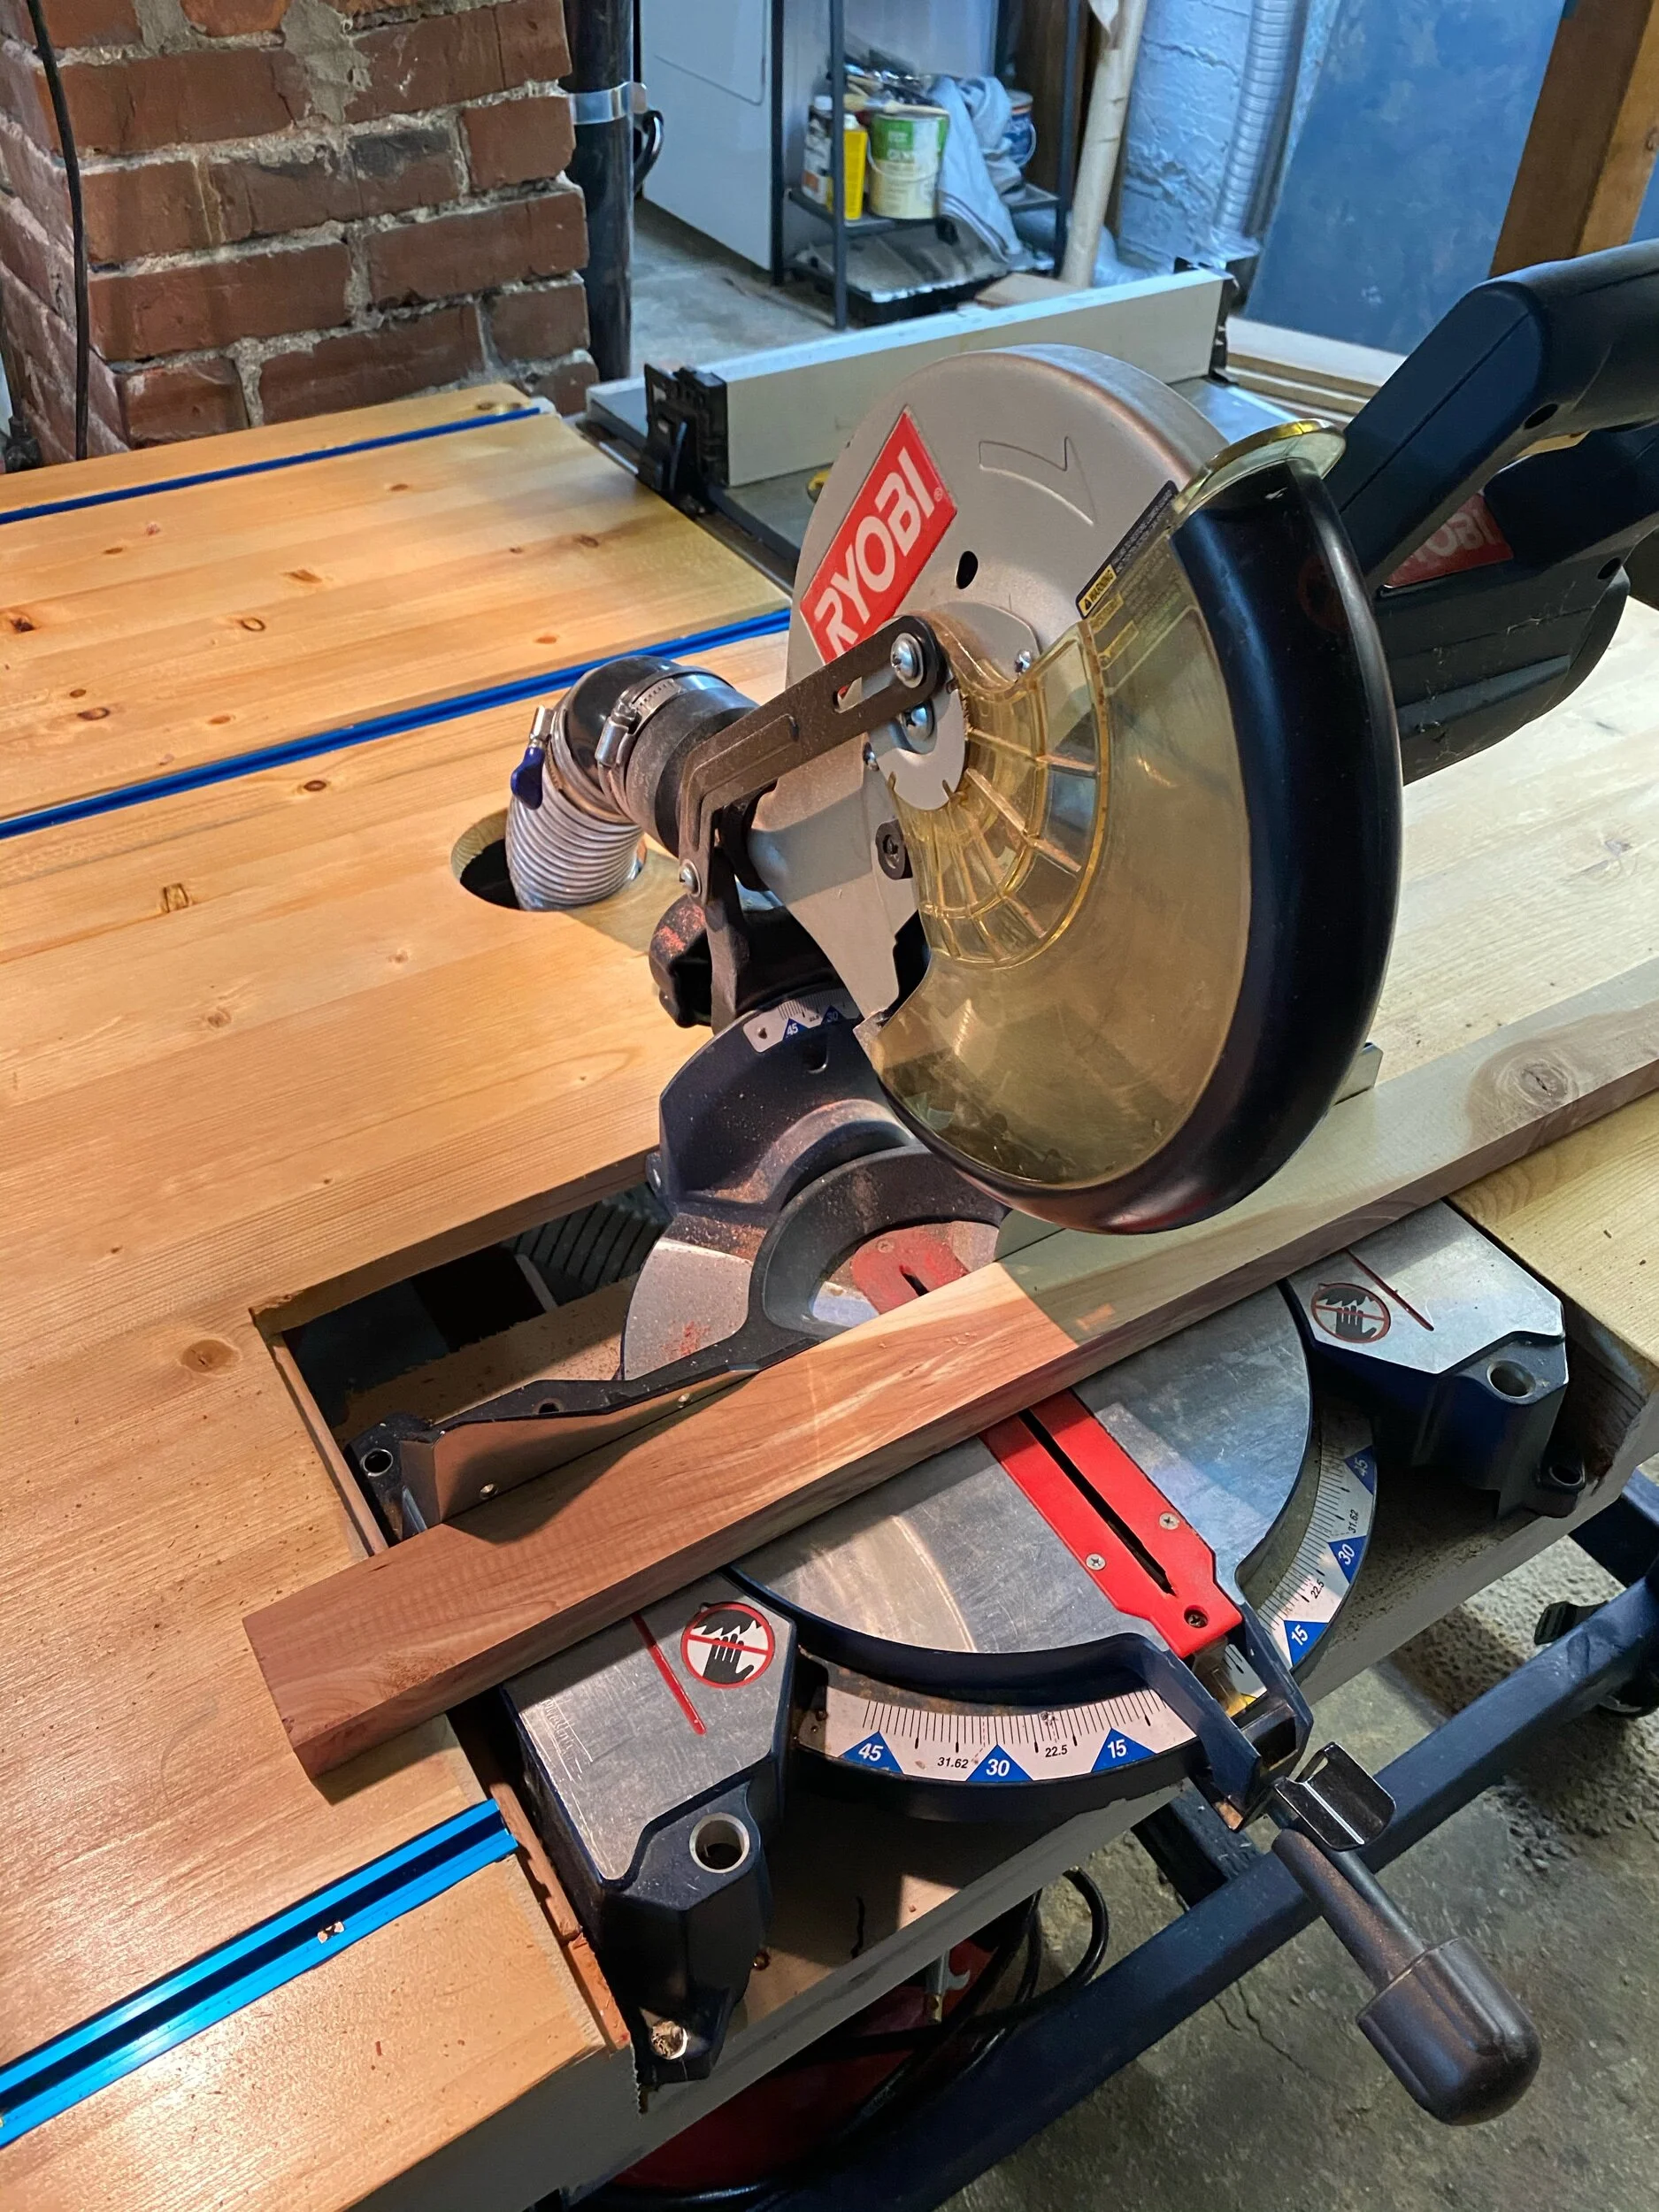
2) Plane to even thickness, .75”. 3) Set miter saw to 30 degrees. Used a 2” wide piece of strap and made a cut 2” down. Then measured the length of that cut (~2.25). Set up a stop block at that distance. The saw is now set up to make a diamond with four sides of equal length.
4) Make 16 diamonds of each type of wood.
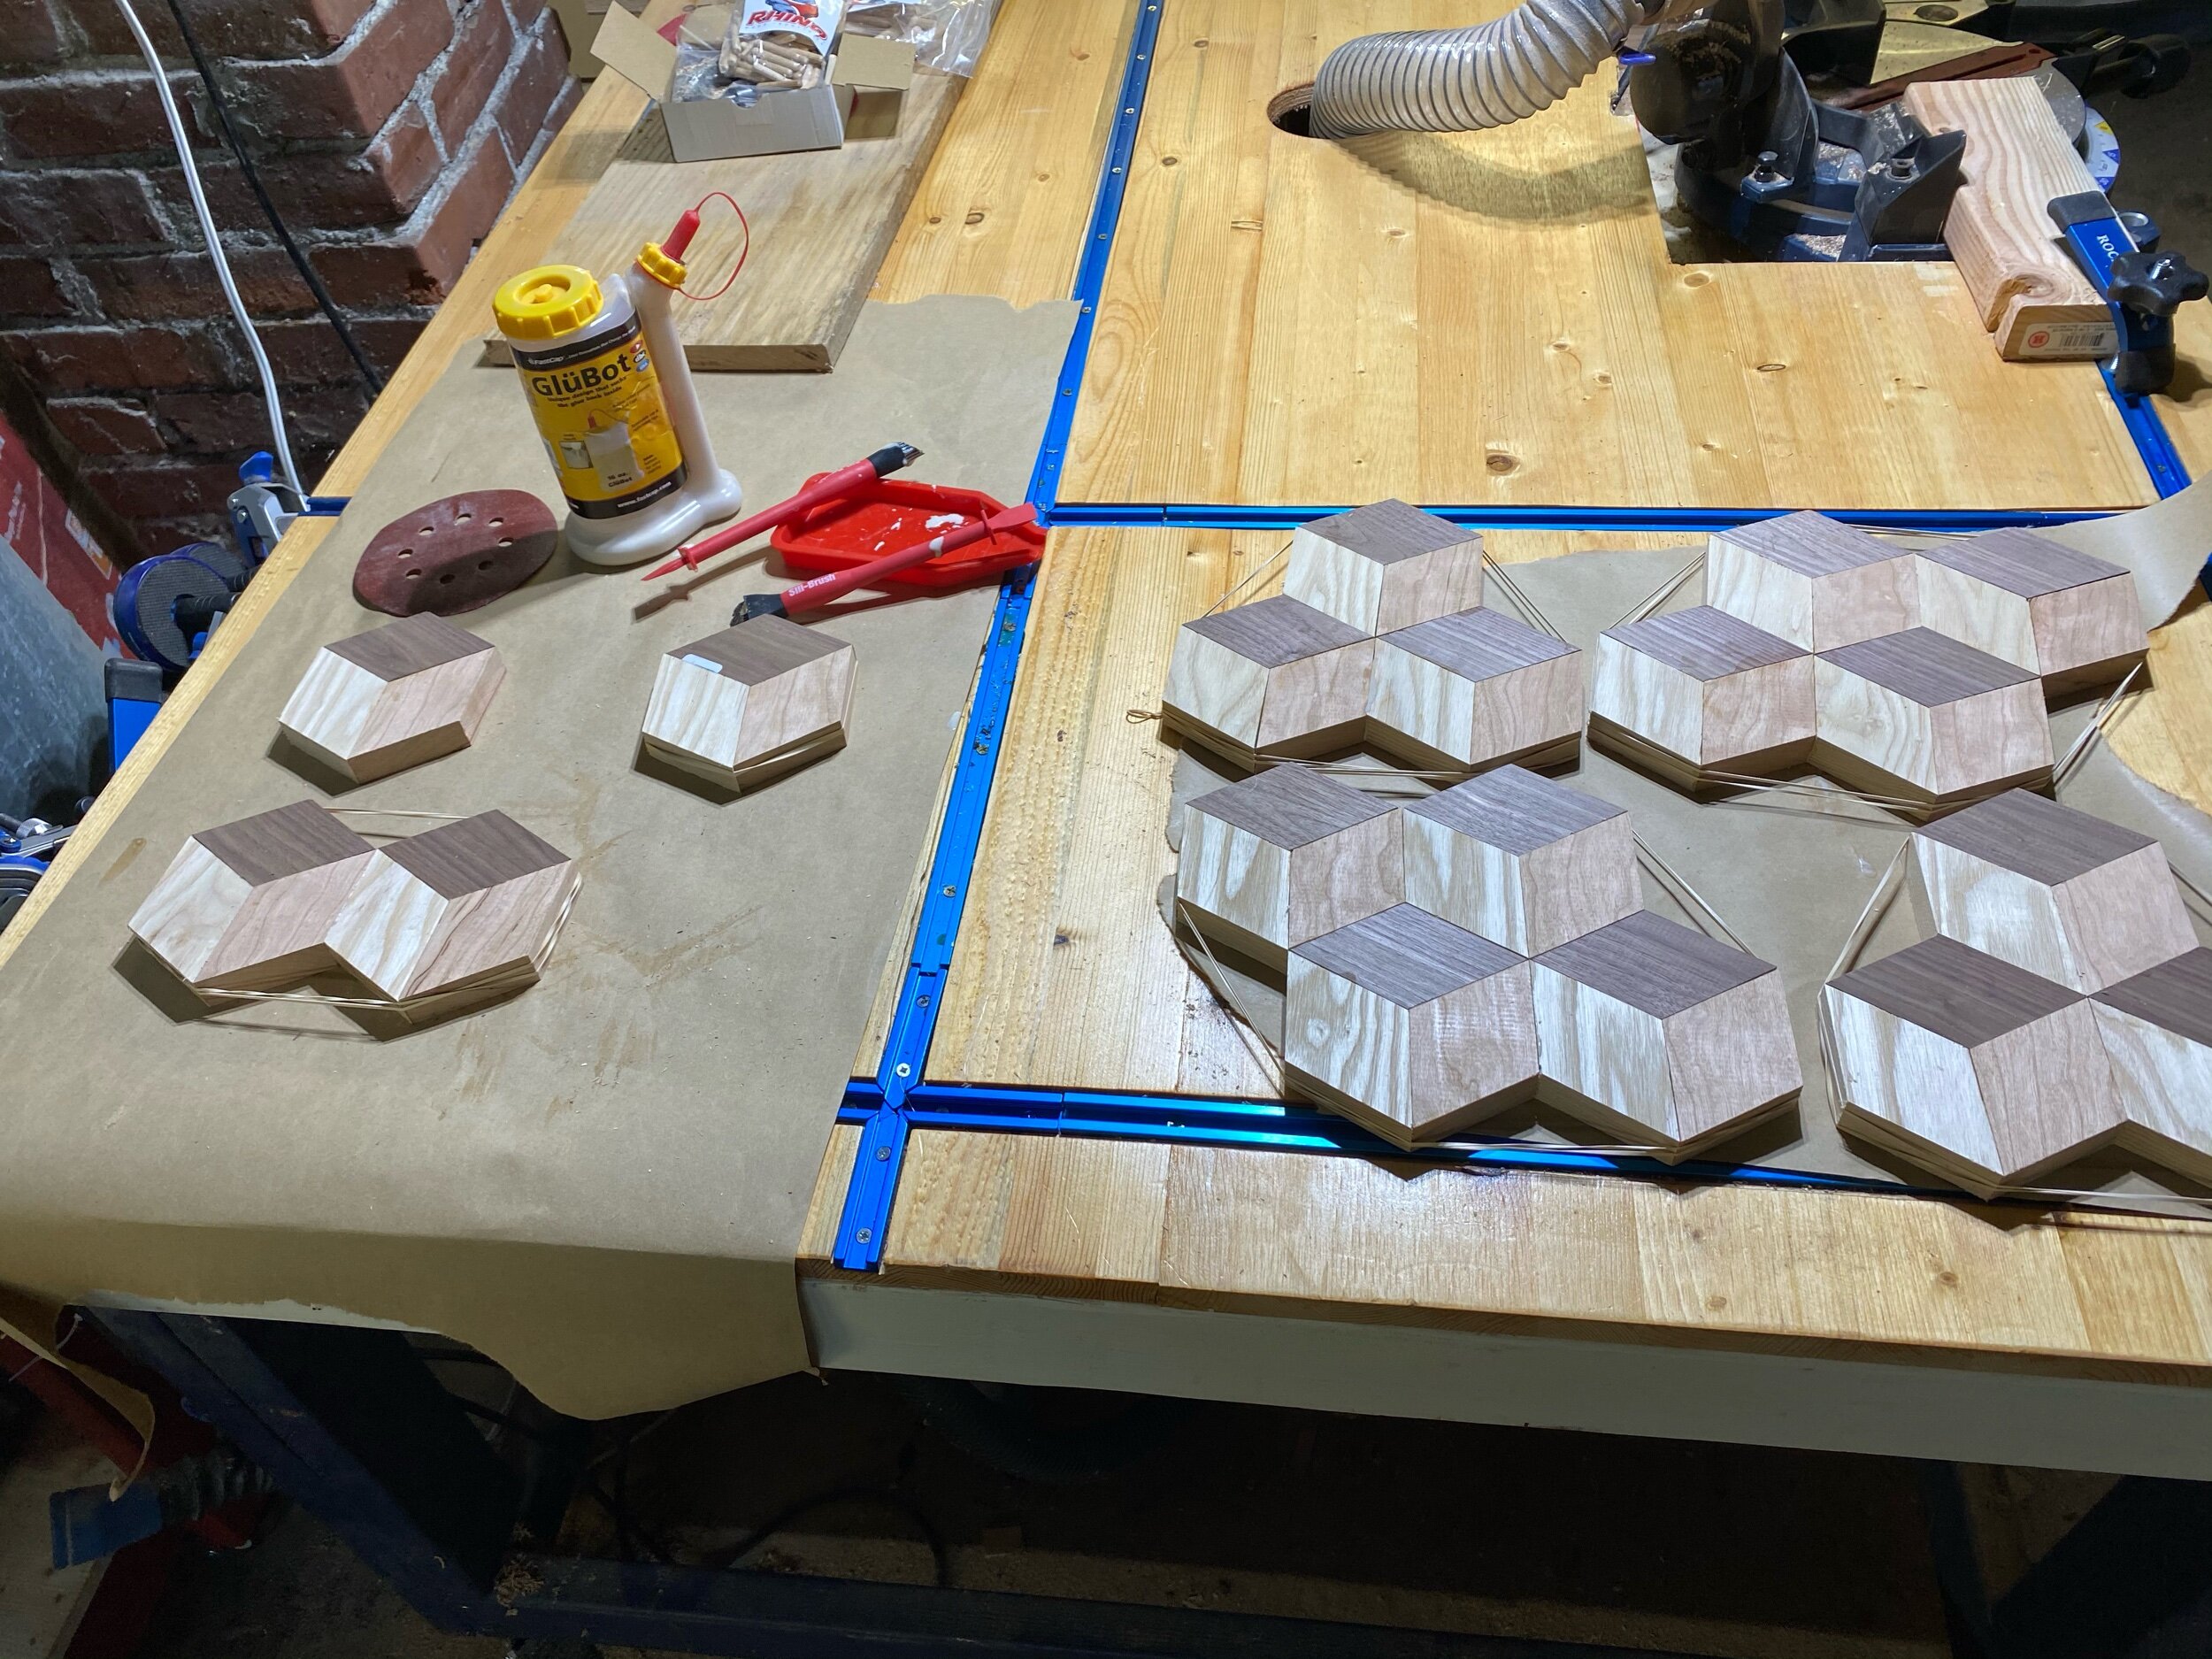
5) Glue hexagons with one each of type. Be mindful of the wood grain and make sure they are the same between all hexagons. Use rubber bands to clamp.
6) Glue the hexagons into clusters of 3 or 4. Be sure each hexagon is oriented the same. I made sure the dark Walnut was on top.
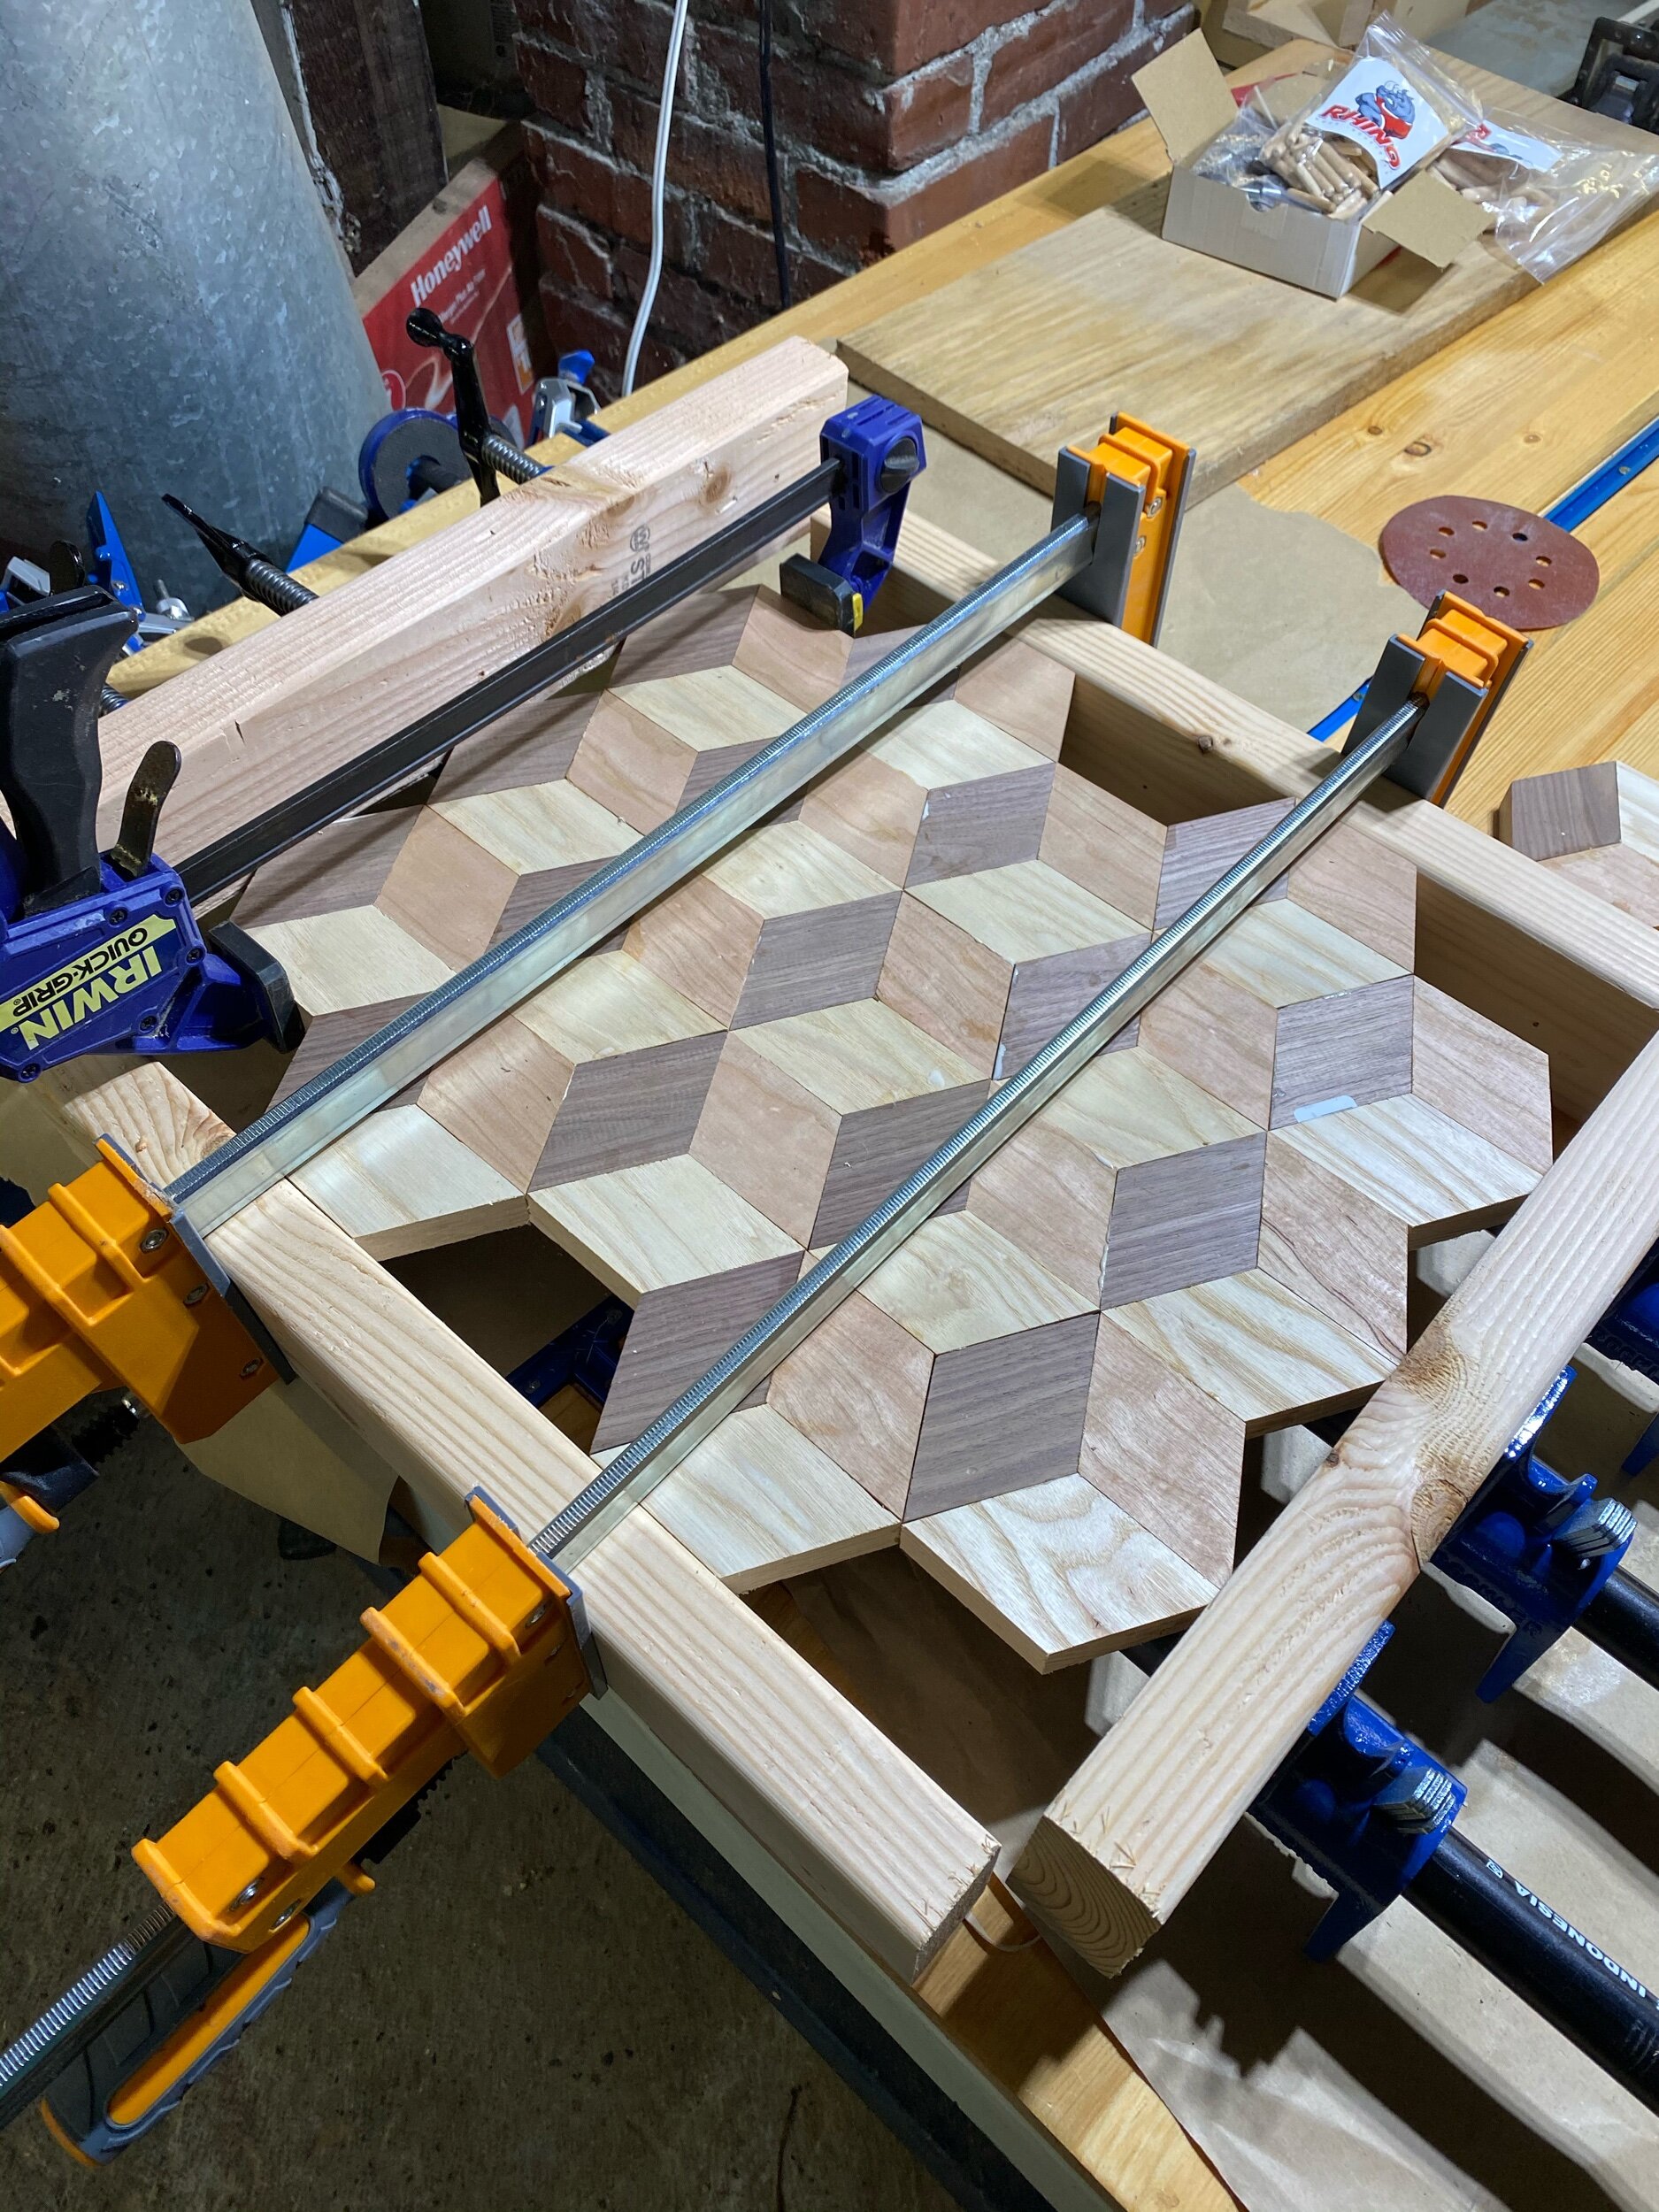
7) Glue all the clusters together.
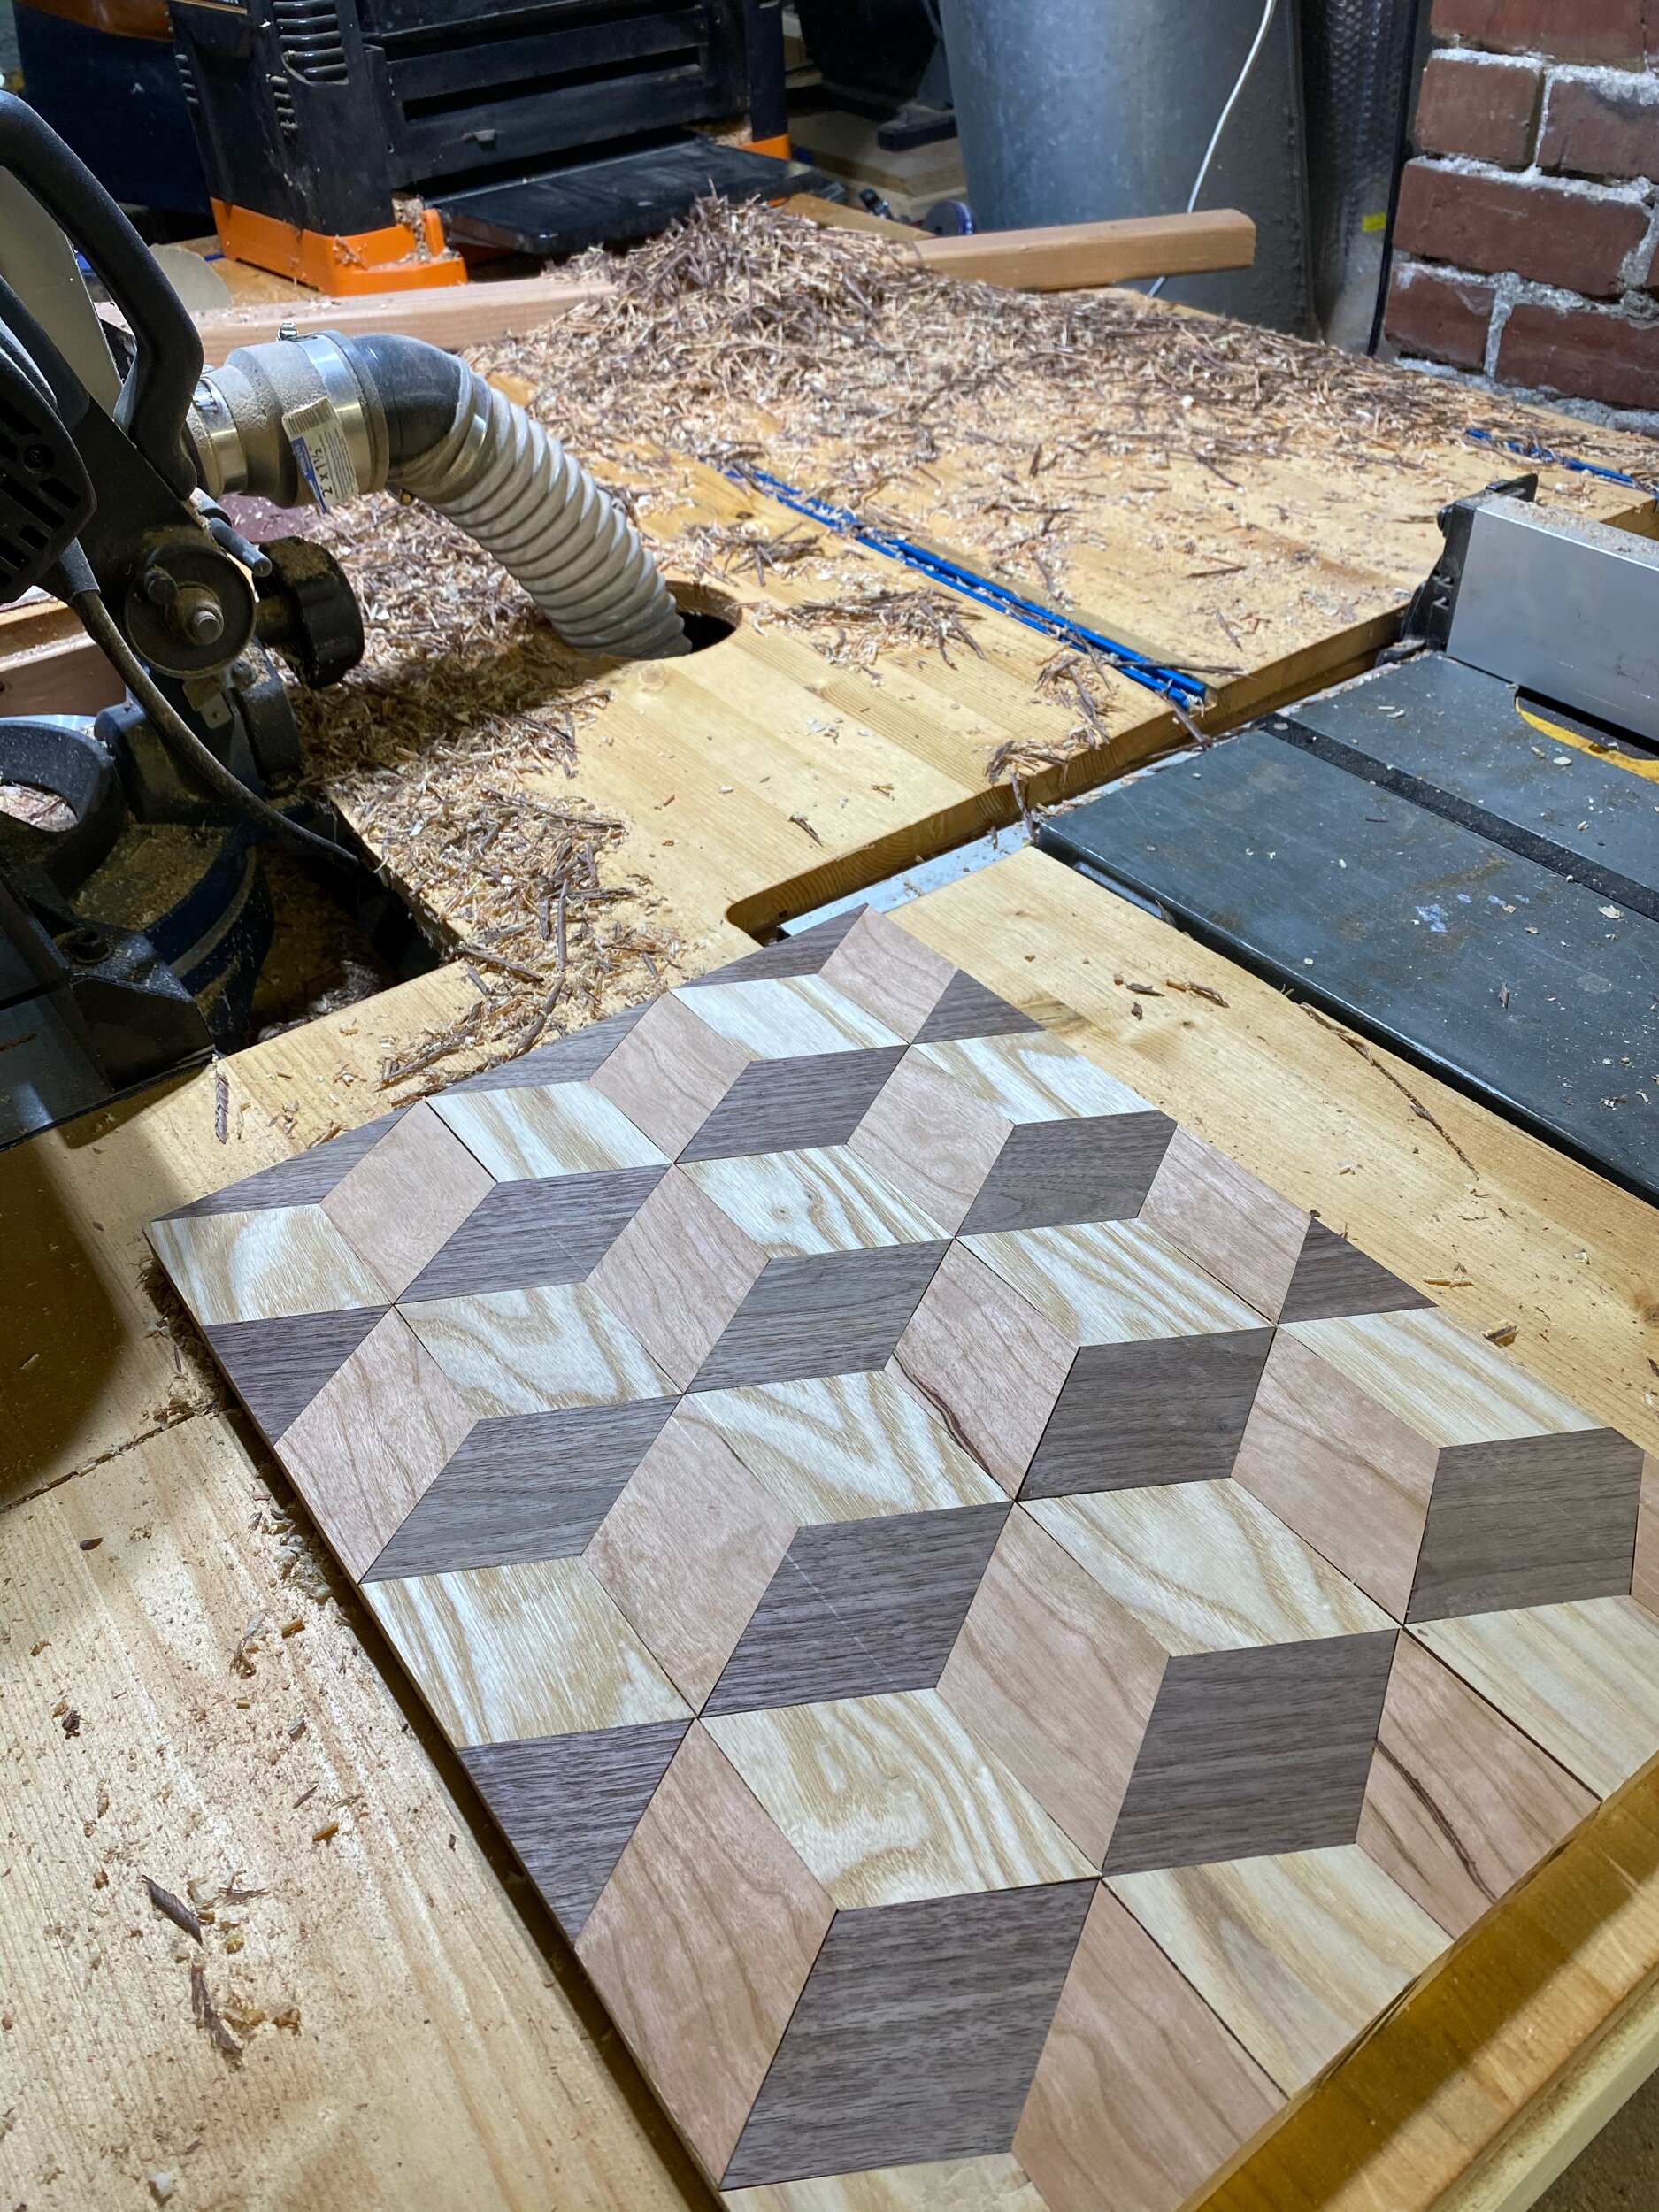
8) Cut off overhangs on the table saw to square up all sides. 9) Fill the gaps with glue and saw dust. 10) Run the board through the thickness planer to level off the seams.
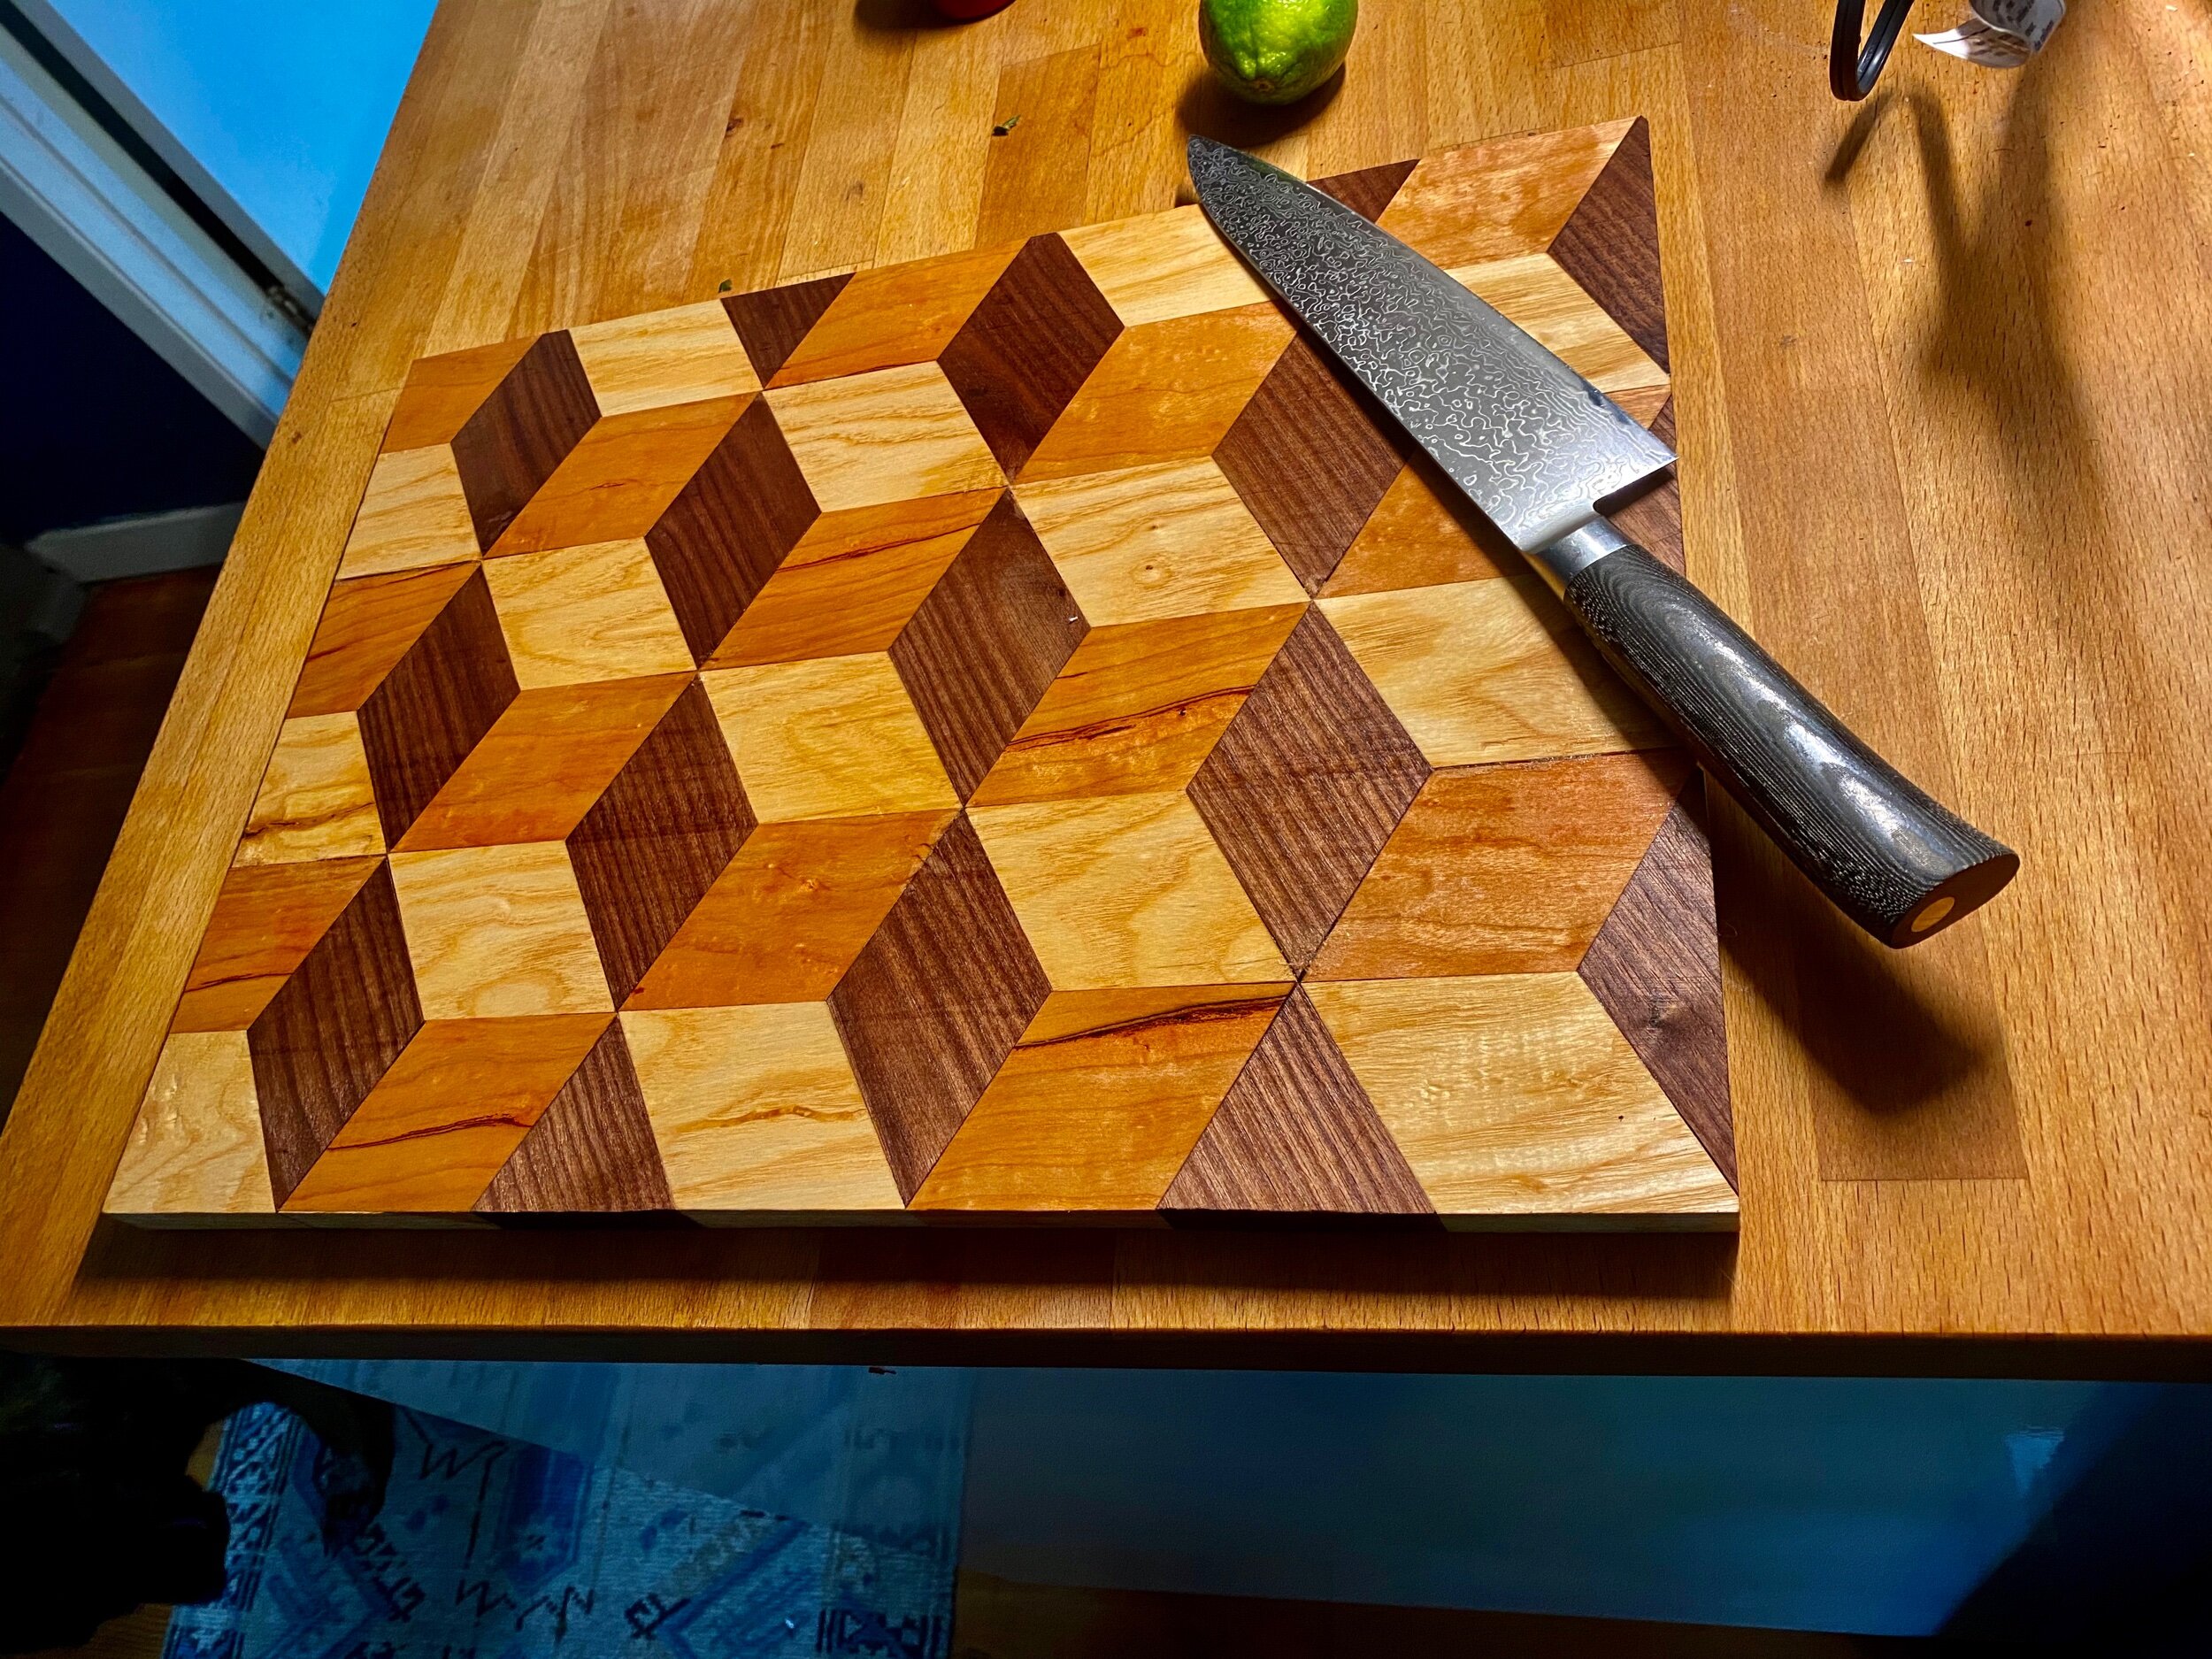
11) Hand sand with 120 grit. 12) Three coats of mineral oil and beeswax.

I am quite pleased with the result and Sara liked it so much she forbade me from giving it away, the ultimate compliment.

Finishing Paddle #5

Once I was pleased with the shape and feel of the paddle it was time to move to the final stage - sanding and applying a finishing/sealing coat.

The sanding is straightforward. All of the shaping was done my hand so this step is really just to make the shaft and grip smooth and comfortable to hold. I used a random orbital sander across the entire surface moving up in the grits: 60, 80, 120. Then I wet the surface with water to raise the grain. It also revealed the color and texture of what it will ultimately look like. And let me just say - Oh. La. La.

Adjustments.jpeg

I then took a sheet of 180 grit, wrapped it around paddle shaft, and, well, stroked it until smooth. I repeated with 220 grit.
At this point the paddle was nothing short of silky.
To seal and protect the wood I like to use a marine varnish. However, it does take away a little bit of the wood feel. There should be a warmth in the palms when holding a canoe paddle. Therefore the grip gets taped off while the blade and shaft get varnished. Then I removed the tape and applied three coats of Linseed oil.

I executed all of this while in conference calls. Hell of a way to spend a day. Making canoe paddles in the sun on the deck while still getting paid. There was a point I forgot to mute and a colleague chimed in with “is someone sharpening a knife right now?”. No Mike, I am not sharpening a knife. I am using a knife. I sharpened it before this meeting. And I will again after this meeting. Besides. It is a far less distracting than the dozens of kids wailing away in everyone else’s background, Mike.
I doubt this will be the last quarantine paddle I make.

Adjustments.jpeg

Canoe paddle #5 made from a single Incense Cedar board

While shopping for lumber for a dining room table I stumbled upon a board of incense cedar. And the rain stopped, and the clouds parted, and a chorus of angels sang. I had no projects that merited this red and white marbled 1x8. Nevertheless, I left the store with it. (But not with the dining table slab I was looking for. Oh well, I guess I get to take another voyage to the glorious Crosscut Hardwoods in the Georgetown neighborhood of Seattle)

At some point it occurred to me that all the paddles I made are laminations of different species of woods. I have never used just a single board.

Step 1: Layout. I needed to find a way to get a paddle that is 8”wide and 60” long out of a board that was 5”x 96” x 1”

Layout: 1) Cut the board to the shaft length 2) Rip the shaft to wide 3) With the remainder, cut the blade to length 4) Resaw/Split in two the blade to create 2 pieces that are 20” x 3” x 0.5”

Layout: 1) Cut the board to the shaft length 2) Rip the shaft to wide 3) With the remainder, cut the blade to length 4) Resaw/Split in two the blade to create 2 pieces that are 20” x 3” x 0.5”

Step 2: Crosscut to shaft length of 60”. Not only did this allow me to save 36” of this immaculate board but handling a 5 foot board is a lot easier than an 8 foot one. Especially in my basement shop.

Step 3: Rip. I cut the 2” wide shaft out of the board on the Table Saw. (notice how my workbench acts as a perfect outfeed table)

Ripped to create two pieces: one for the shaft (Right) and a thicker piece that will be split into two for the blade (Left)

Ripped to create two pieces: one for the shaft (Right) and a thicker piece that will be split into two for the blade (Left)

Step 4: Crosscut blade to size. Of the 3” x 60” that remained I only needed 20” for the blade. A quick task for the Miter Saw to chop that off.

Crosscut to the length of the blade.

Crosscut to the length of the blade.

Step 5: Resaw to book-match and thin blade. “Resaw” is the process of cutting a board along its thinnest dimension - like opening up a hotdog bun. I needed the blade to be wider than the 3” I had. Also, I didn’t need it to be 1” thick. So I took it to the Band Saw and split in half. Then I opened it up like a book so that the grain pattern is “book-matched”.

Ultimately I was left with 2 pieces that were 3” x 20” x 0.5” and one that 2” x 60” x 1”. When that was all laid out the blade is 8” (3+2+3) wide and 20” long. And the shaft is 2” wide by 60” long.

In the next post I’ll cover gluing and cutting the basic paddle shape.

One board cut into 3 pieces and layout out.

One board cut into 3 pieces and layout out.